You want cheaper leads from your list building ads, am I right? I don’t blame you.
In my last blog post, I showed you my own retargeting campaign designed to grow my list. You know, the one that makes me more money than I spend on it every week.
And now I’m going to show you exactly how to set this up for yourself!
Let’s start with the pieces you’re going to need:
1. An evergreen lead magnet. I’m talking about a free report, a swipe file, an on-demand video training – anything people can access immediately and doesn’t require a million hours for your subscribers to read, watch or listen to it.
Bonus points if you’ve already tested this lead magnet with Facebook ads and it performed well.
2. A sign-up page. I use Instapage and am very happy with them. (I use them for all of my sales pages as well, DIYing my design all the way.)
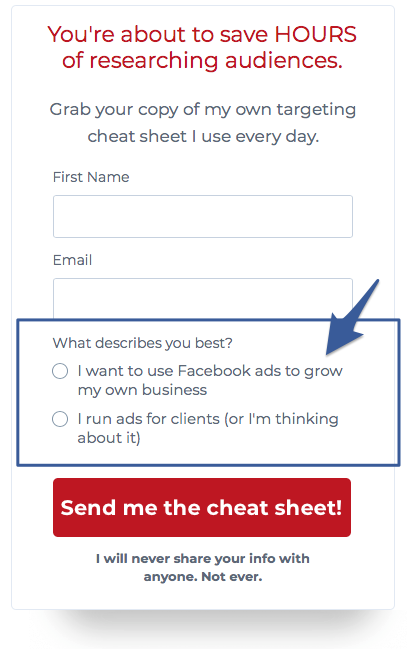
Bonus points if you can add an ASK Method-style mini-survey to the sign up page that will help you segment your audience. Here’s mine:
3. A thank you page. After people sign up, they MUST be redirected to another page with a unique URL. You can put anything on this thank you page (including a tripwire product offer), but it needs to have a unique URL so you can track conversions.
Bonus points if you put a limited-time tripwire offer on this thank you page. I’ll go into details on how to set this up in my next post.
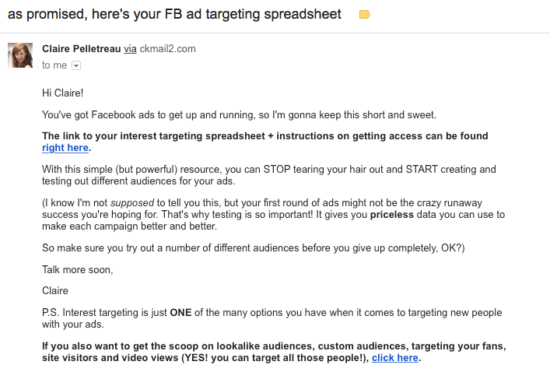
4. An email that delivers your lead magnet. I use ConvertKit, and each of my lead magnets has its own sequence: the first email explains how the subscriber can get access to the lead magnet, and the subsequent emails are designed to warm up my subscribers. I tell them more about who I am and also give away lots more free and valuable content.
5. Your Facebook Pixel added to the header of your site. I’ve got instructions on how to do this on Wordpress and Squarespace sites.
6. Your Facebook Pixel installed on both the sign-up page and the thank you page of this lead magnet. If you use any kind of page builder (like Instapage, Leadpages, OptimizePress, Unbounce, etc.) you will probably have to re-install the pixel on every page you build.
To do this, grab your pixel from the Events Manager section of the Ads Manager:

Then click the Set Up button:

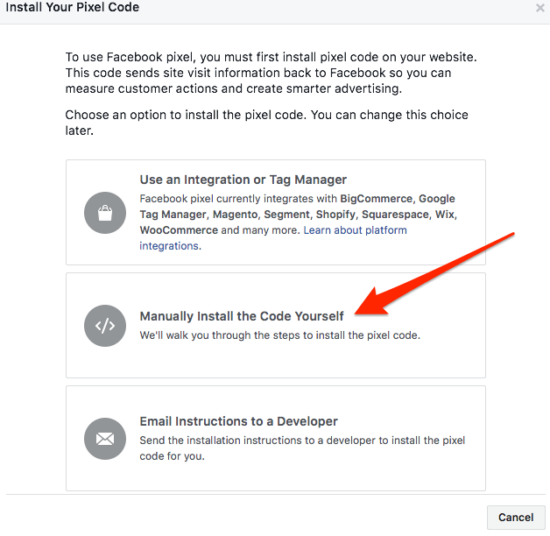
Choose “Manually Install the Code Yourself”:
Then click the code to copy it to your clipboard.
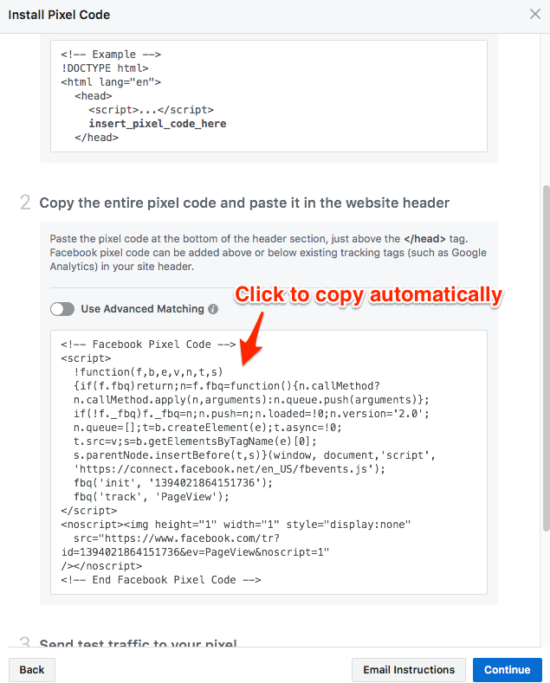
Then paste it in the Header or Scripts section of your page builder.
Some page builders have a spot where you just have to input your pixel ID number and they do the rest. In Instapage, it’s under Settings > Analytics > Facebook Pixel. You can find your pixel ID number on the Events Manager page:
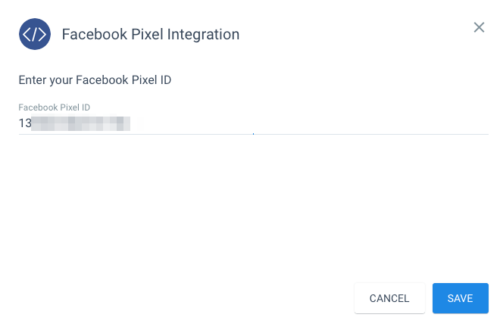
6. A custom audience of your site visitors. If you’ve already had your Facebook Pixel in place for a couple of weeks, chances are you already have enough website visitors to be able to retarget them. But that audience doesn’t automatically populate in the Ads Manager – you have to create it.
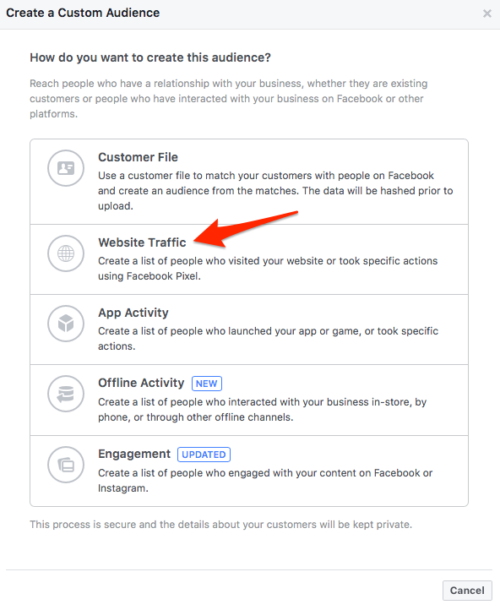
In the Audiences section, click on Create Audience and choose Custom Audience.

Then click Website Traffic:
Change 30 days to 15 (or less) and then name your audience:
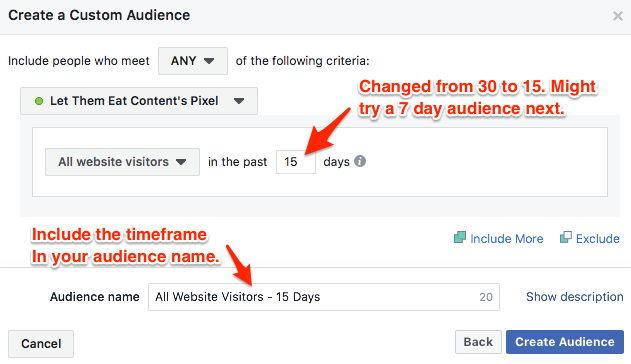
Click Create Audience and then you’re set!
You won’t see the exact number of people in this website visitors audience, and it will take a little time to populate. But you can still set up your ads to run immediately.
7. Your ads. The final step is getting a couple ads for your lead magnet up and running to this audience. Even though the people you’re targeting with this campaign have recently visited your website, you can’t assume that they actually know anything about you or your brand. (I signed up for a couple lead magnets this week but have zero idea WHO is actually behind them.) So I recommend creating your ad as if it were going in front of cold traffic.
Here are some posts that’ll help you get this going:
- How to write Facebook ad copy
- What images to use (pro tip: I would test out an image of you versus one without, the way I’m doing in my own retargeting campaign).
- A walkthrough of the current Ads Manager
As for your budget, I would stick with just $5/day.
Need hand holding as you get this campaign up and running? That’s exactly what’s happening over in the Absolute Support Group. Enroll in Absolute FB Ads and get your questions answered today!
In the next post, I’m showing you the behind-the-scenes set up of my tripwire offer. You don’t want to miss the details of how I decided what product to make, created it, and then how I made $8000 with a super simple launch before adding that product to my funnel.
Heads up: some of the links in this post are affiliate links, which mean I may earn a commission if you choose to sign up for one of the tools I talk about.






Great article!